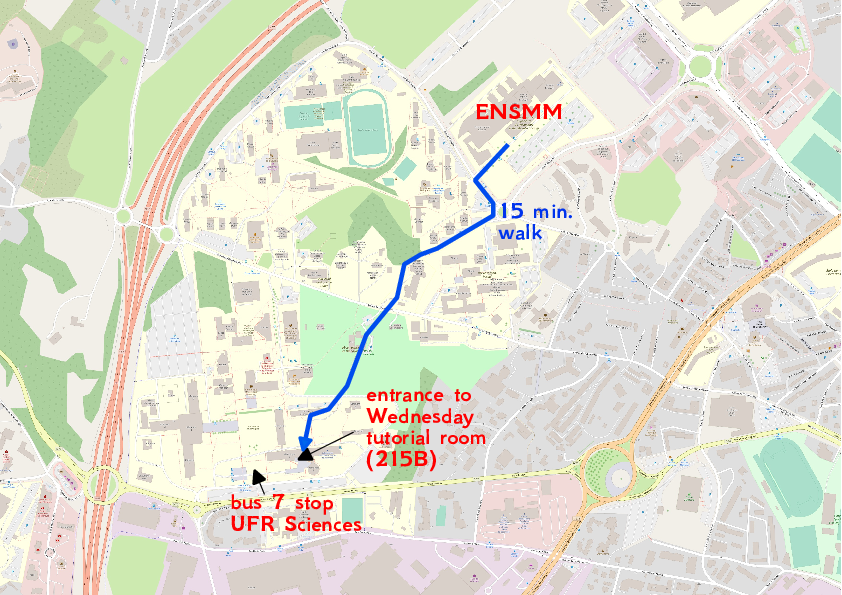
Wednesday tutorialWednesday tutorial will take place at university since we need native GNU/Linux computers to run Vivado (2018.2) + Buildroot. The room is 215B in Metrologie building (B) on the scientific campus: a 15 min. walk from ENSMM. We meet at 8:30 AM at entrance of ENSMM or 8:50 AM in front of Metrologie building to go together to the tutorial room. A map of the area is provided below (link to the PDF version : 215B.pdf
Quick notes taken while preparing the lab session, in case you wisht to reproduce on a personal computer brought for the lab session: 1. We added a user dedicated to the lab session so the account could be cleaned easily after completion: adduser pluto mkdir build && cd build && cmake -DCMAKE_INSTALL_PREFIX=/usr ../ && make && make install 2. Generating the custom bitstreams relies on the official ADI PlutoSDR repository which must be cloned on each computer: 3. the buildroot environment will be shared between all users through an NFS server in order to save space and compile time. There should be no need to change the buildroot configuration during the lab session. In our case this step is completed on the administrator account shared via NFS (/home/jmfriedt), could be done on your personnal account for the lab session:
4. Finally we clone in the lab session user directory the OscImpDigital framework repository and maje sure that the first tutorial synthesizes 5. Work in progress: find a way to transfer the DFU image to the PlutoSDR should generate dfu and frm files while make flash_dfu_frm should send the PlutoSDR reboot command by ssh (assuming the network is properly configured), wait for 10 seconds and transfer the DFU file to the PlutoSDR flash memory. |


